So let's make something together. I give you my...

I participated (is that the correct verb?) in a Twitter party the other night and we were talking/tweeting about trends and what colors were hip for summer. I am loving the neons & brights that are back from the early 90's and am having lots of fun wearing them again. I was a big proponent of neon back when I was a kid. Give me some Lisa Frank or something (like, pretty much anything) that was hot pink, and you had a friend for life. I started wondering if neons would work in home decor, so I decided to conduct an experiment.
Backstory: I made ER a crib rail guard from this tutorial as she was entering the Sunny-from-A-Series-of-Unfortunate-Events stage. Anything and everything was subject to being bitten, and I wanted to make her something cool to protect her crib rails. This was my first full-on sewing project (a bit ambitious, I know) but it came out OK! The layers of the crib rail guard included decorative flannel on the top, and waterproof flannel & quilted batting on the inside. I overbought because I am terrible at figuring out amounts of fabric. I'll tell you why I'm even mentioning this in a minute.

When K and her hubs were here a couple of weeks ago, we made equality/love is love/don't be hatin' t-shirts to wear to Etown, inspired by a project I pinned a while back. I had gotten these Tulip fabric spray paints for our t-shirt project. I knew they'd work perfectly for my pennants.

You know what else would work perfectly? The leftover waterproof flannel from the crib rail guard. It is sturdy and I knew it could stand up to the wetness from the fabric sprays. LOVE using up supplies from my stash!


The pennant shape is cut from a rectangle. I did a {precious} little math, found that I had a 15" width of fabric, so I just decided to make 3 cuts to get 5" strips. I folded it in half so I cut (haha, get it?) my cutting time in half.

After this, I cut the long strips into 6" sections, so I ended up with 5"x6" rectangles. My next step was to make the triangles. I made a little pencil mark at the 2 1/2" mark (since that's halfway across the 5" width of the rectangle)...
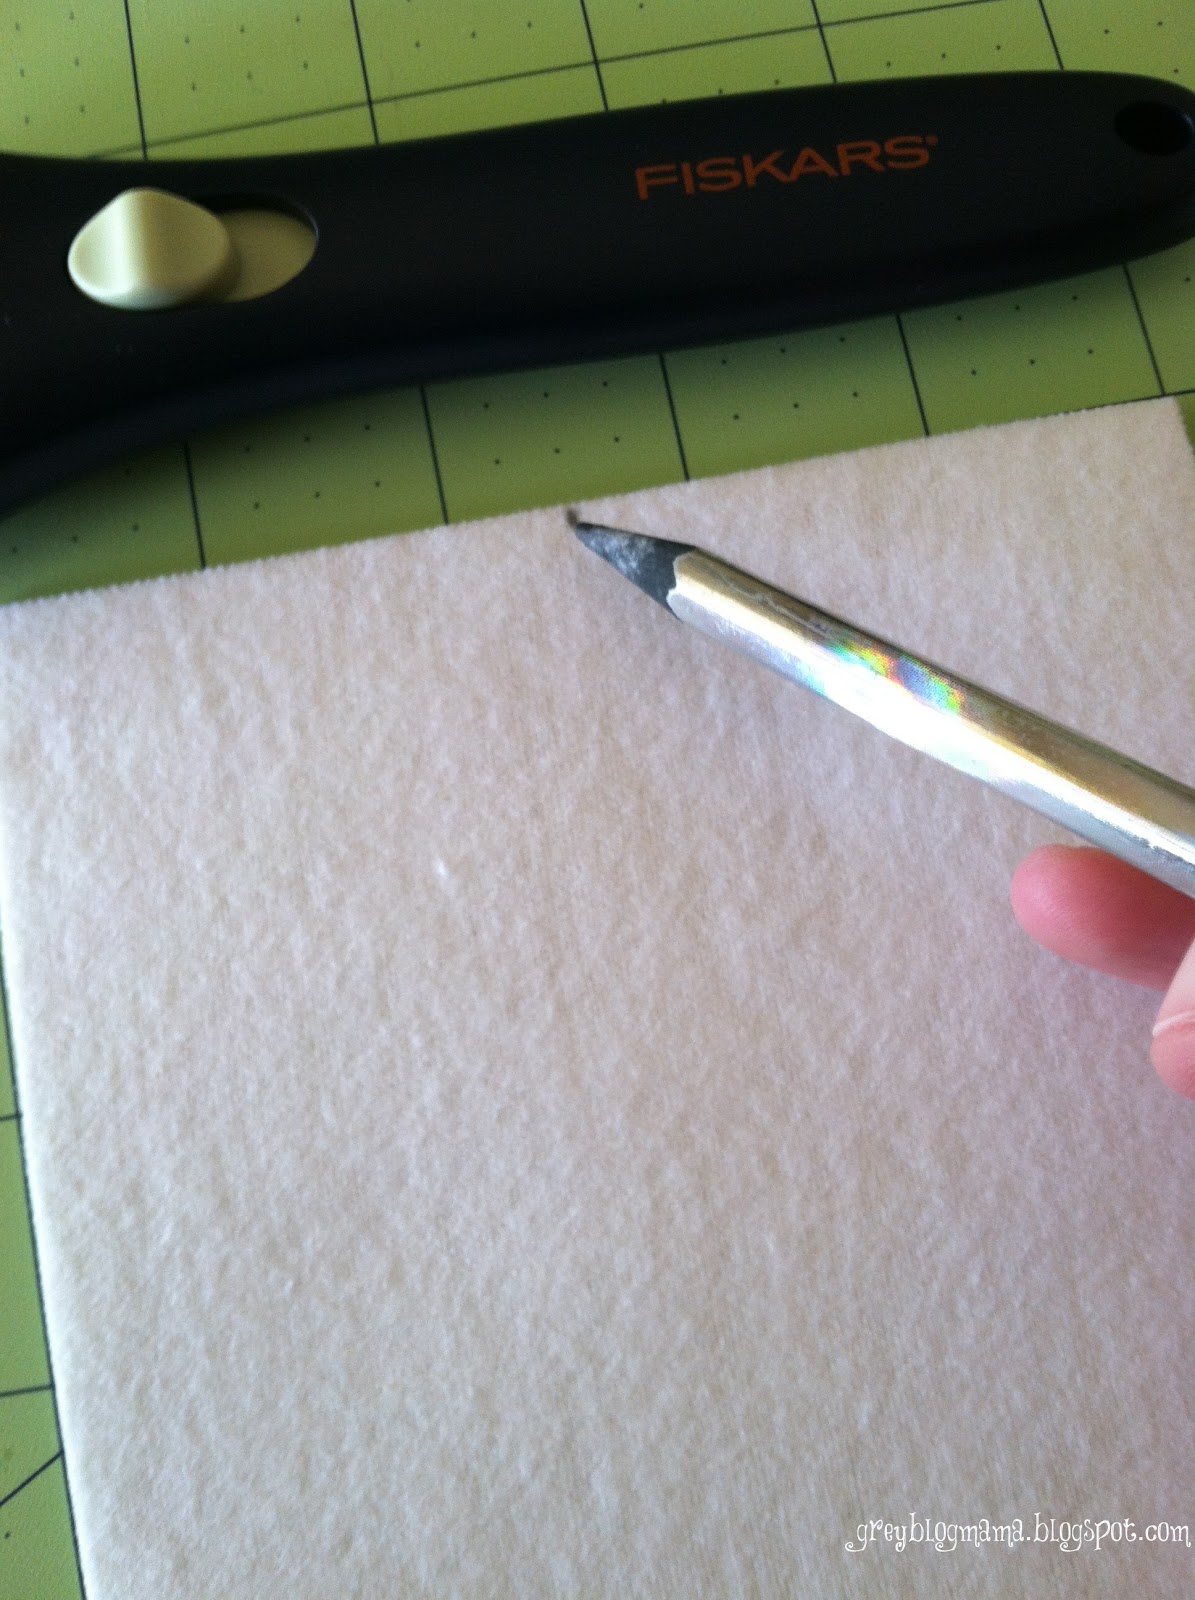
lined up my clear cutting ruler with the dot I had made and the bottom left corner (lefties would flip it, I guess)...

...and then flipped my little piece of fabric over and made the same cut on the other side, lining up the point of my soon-to-be triangle and the top left corner of the fabric.

I was left with a perfect triangle! The pencil mark I made was a little dark, and I tried to erase it on this triangle with little luck. I made my marks much lighter after this one, and if they were too noticeable, I just made the marked side, the back!

Next, it was time to get Ol' Reliable in on the action. By the time I was ready for her, she was, indeed SCREAMIN' HOT! I laid out a piece of wax paper and started making circles, zigzags, and lines. All of these shapes would become the masks (the opposite of a stencil) I'd use to make my pennants look extra spesh.
The reason your hot glue must be SCREAMIN' HOT is because the more liquidy the glue is, the easier it will be to keep it moving to make all of these shapes. To make any shape, I've found that it's easier to make the outline and then fill in toward the middle until the piece is solid. I think this might be like decorating a cake. The trick is to keep dispensing the hot, molten glue continuously. The shapes were a little irregular, but this is a craft. It's not physics.


While my glue masks were cooling, I primed all of my pennants. I wanted to add some element of uniformity to them so the whole thing didn't come out a hot mess, so I primed each one with the same color paints. I put them at the bottom of a shopping bag to contain extraneous spray...

and gave each flag a little base coat of yellow & blue!

By the time I was done preparing my 12 pennants, I could peel my masks from the wax paper. Some paper stuck to the back of the cooled glue, but I just picked off the paper enough so it wouldn't get in the way of the shape I was after.
And I started creating!


I had no plan for the outcome of my pennants. My method was, and usually is, purely based on process (as was my music teaching, btw). I had so much fun experimenting with shapes, the blending of colors, adding white spray here and there...each time I did one thing, I was inspired to do another.
When I was all done spraying, I let the flags dry overnight. Feeling particularly lazy/impatient to get my project done, I nixed the sewing and cut little vertical slits near the top corners, through which I threaded a ribbon. I sent the ribbon around the back of each flag so they would lay flatter when hung.

I'm pretty excited about the way the whole project came out and am on the look out for other things I can bring in to compliment it. The colors softened as they dried and I think the look is subtle, but fun. It's spring and summer's a-comin'. Time to bring in the brights!

How do you feel about the return of neon? Would you use it in your decorating? Did you wear neons in the 90's? Did you wear two different shades on Zinka on your face like I did?!
No comments:
Post a Comment
Leave a Mama some comments!